


Sunday, September 28, 2008
More button jewellery
It's spring here in Australia and I have been inspired by all the sights and smells of the season. I whipped up this little brooch using some more thrifted buttons. Doesn't it look so fresh and "springy"?
Thursday, September 25, 2008
Don't try this at home lol.......
I bought this men's shirt at an op-shop ages ago cause I liked the fabric. This pic doesn't do it justice, it's a really lovely antique cream colour with a self pattern. It's made in Spain believe it or not!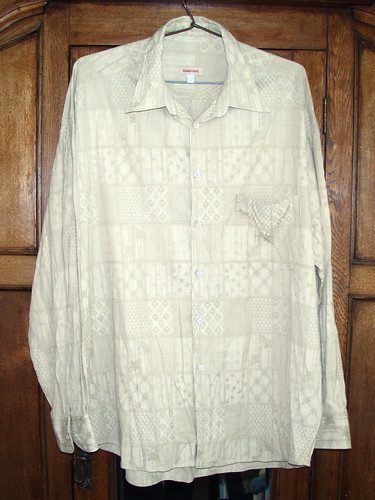

 I think I'll go order that pattern now.....
With the warmer weather I decided to make it into a blouse. I've been eyeing off this Built by Wendy pattern for a while, and thought I'd do something similar. I wish I'd bought the pattern instead of going it alone!
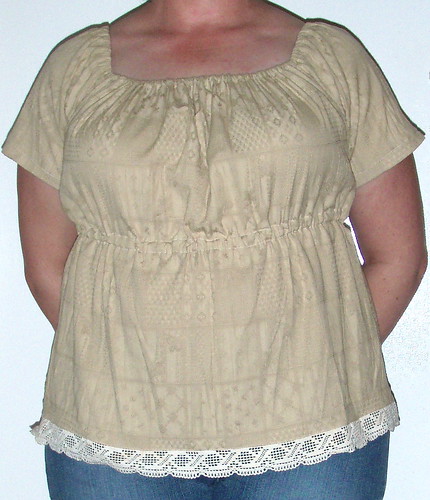
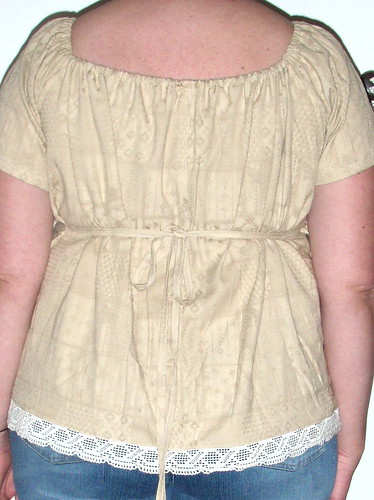
Man, I spent some time on this....... I'm quite happy with the results, although it kinda looks like a maternity top. I think the elastic under the bust is a little low.
I used some vintage lace, also from an op-shop, for the trim.
I think I'll go order that pattern now.....Wednesday, September 24, 2008
Ravelry and learning to knit.......
I can't help myself, I have a go at everything! I recently became inspired by a fantastic knitting resource called Ravelry . This site has free patterns for everything you could ever want to knit or crochet. It's unbelievable! I have done knitting over the years but my repertoire has been limited to very basic patterns such as scarves, beanies and basic pullovers. Now I have this amazing resource but I don't have the cash to buy new yarn. As our budget is limited and I like to be as eco-conscious as possible, I decided once again to use thrifted or recycled materials. Op-shops are a great source of so many things, and yarn is one of them. Sure you can pick up odd balls of yarn, but a great way to get lots of the same sort is to harvest it from ready made items. Men's jumpers are great for this.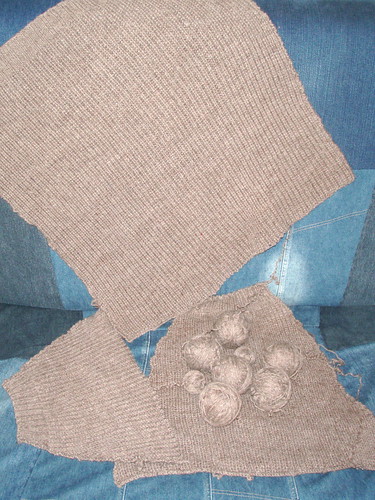 I started to unravel this one before I thought to photograph it but suffice to say it was a large basic jumper. It was hand made so the seams were pretty easy to unpick. Once that was done it was just a matter of rolling it into balls.
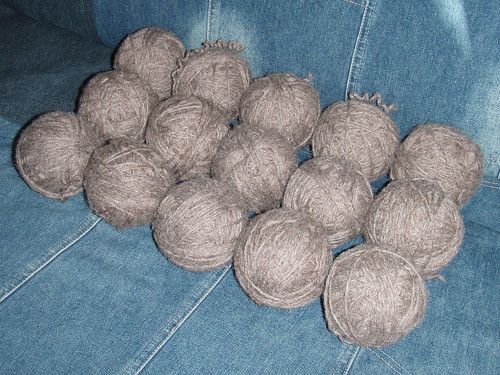 Wow! I got 15 balls, 900 grams of what appears to be pure wool. For only $4! Can't get better than that!!!!!!!
I started to unravel this one before I thought to photograph it but suffice to say it was a large basic jumper. It was hand made so the seams were pretty easy to unpick. Once that was done it was just a matter of rolling it into balls.Wow! I got 15 balls, 900 grams of what appears to be pure wool. For only $4! Can't get better than that!!!!!!!
Weave it baby!
Inkle looms are little looms that you can make narrow strips of woven fabric on. I got mine at an op-shop for $5! 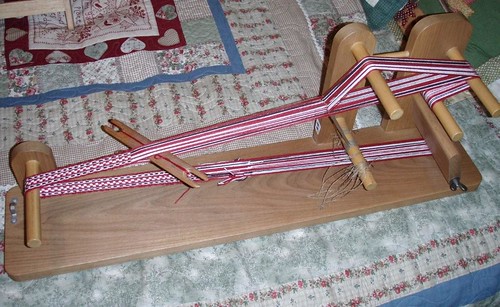 A dear old man in our little town showed me how to use it and I did some weaving on it. I didn't know quite what to make with it until the warmer weather hit. You see I needed a way to hold my ipod when my clothes don't have pockets. So I created a little bag with a loop that I can string a lanyard from and hang it around my neck. Perhaps there is a market for these as an accessory for nudists!
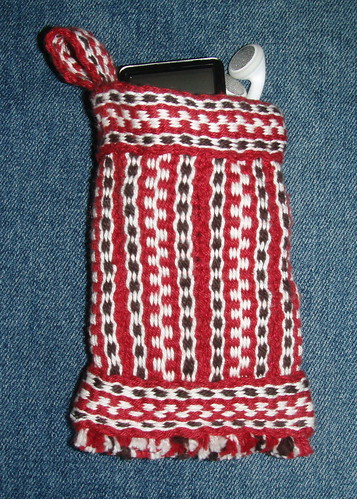
A dear old man in our little town showed me how to use it and I did some weaving on it. I didn't know quite what to make with it until the warmer weather hit. You see I needed a way to hold my ipod when my clothes don't have pockets. So I created a little bag with a loop that I can string a lanyard from and hang it around my neck. Perhaps there is a market for these as an accessory for nudists!
Thursday, September 18, 2008
I've been busy......
I spent a fabulous day making some felt and another day turning it into these bags. I used my hand dyed wool tops, some unusual "yarn" I picked up at an op-shop and some alpaca to create the felt. I made use of both sides of the felt to create two different looks. 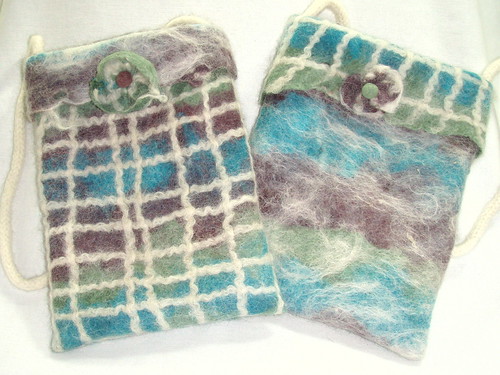 I lined the bags, added an interior pocket and a felted i-cord made from the same yarn as a handle. They are soooo soft and very pretty with their felted flower with a felt ball centre.
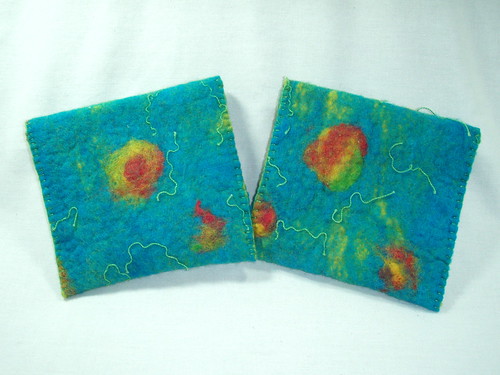
 I also turned the felt I made earlier into a couple of little pouches. They are about the size of a CD. I haven't decided whether to add a handle or not.
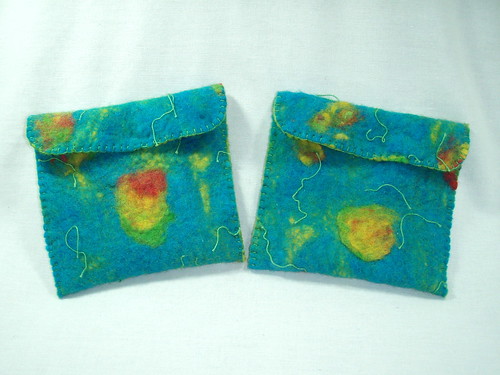
 My vast collection of thrifted, vintage and retro buttons came in handy to make another cute bracelet, this time with many shades of blue as the theme. These are so fun to make, and every one is so unique.
 Another fun one to make was this bracelet with hand felted beads, thrifted glass beads and what appears to be granite beads. Felt jewellery is so tactile, I love it!
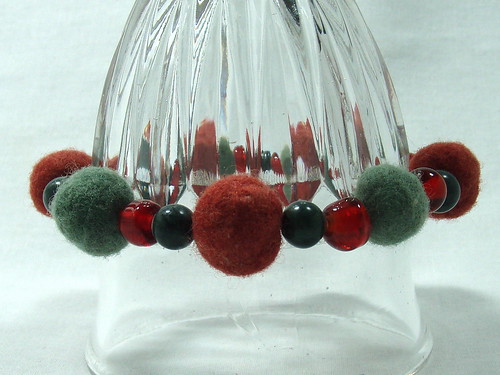 All these items will be listed on etsy soon. I want to have enough items to make it interesting before I start listing. I'll let you know when my shop is open.
I lined the bags, added an interior pocket and a felted i-cord made from the same yarn as a handle. They are soooo soft and very pretty with their felted flower with a felt ball centre.I also turned the felt I made earlier into a couple of little pouches. They are about the size of a CD. I haven't decided whether to add a handle or not. My vast collection of thrifted, vintage and retro buttons came in handy to make another cute bracelet, this time with many shades of blue as the theme. These are so fun to make, and every one is so unique. Another fun one to make was this bracelet with hand felted beads, thrifted glass beads and what appears to be granite beads. Felt jewellery is so tactile, I love it!All these items will be listed on etsy soon. I want to have enough items to make it interesting before I start listing. I'll let you know when my shop is open.How exciting!
I've been featured on the Carnival of Green Crafts over at Crafting a Green World! Well, ok, I put the submission in myself, but it's still very exciting. They even put a pic of my lounge! Check it out, there's heaps of links to cool eco-friendly crafts........
Wednesday, September 17, 2008
Check out this site!
You may notice that I have added a button for Craft Sanity. Jennifer Ackerman-Haywood has a fantastic blog and podcast on all things crafty. She records her show weekly, and has amazing interviews with innovative crafters. I download the approximately hour long episodes to my MP3 and listen to them while I do the housework, that way I can be inspired to create when all the jobs are done. There are so many topics and varieties of crafts discussed, and Jennifer is great at making it very interesting and fun. So check it out, you can listen online or download the podcast like I do. Just click on the Craft Sanity button on the left.
Sunday, September 14, 2008
Lounge makeover
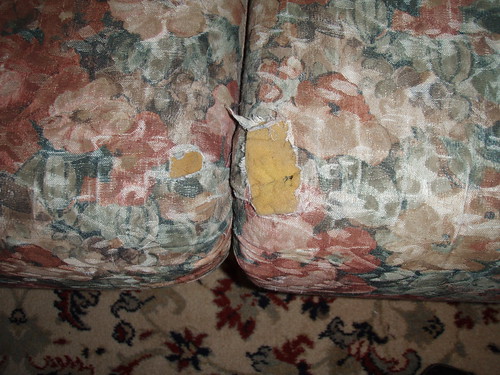
My lounge was ugly. Damn ugly. I say "was" because now I love it! And I made it over in a very eco-friendly and cheap way. Here's the before shot. 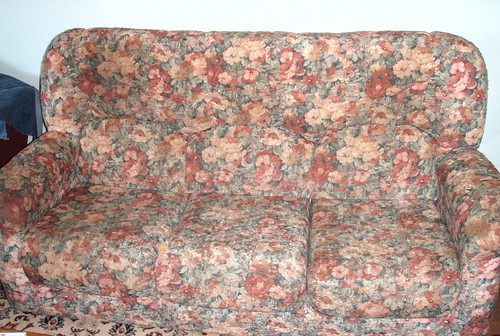 The lounge was structurally perfect but after 10 years of use it was very threadbare.
 I never really liked the pattern anyway, I ordered it off a swatch and thought it would hide the dirt, but it was much too florally (is that a word?) for me. First I cut up my fabric. I used 4 pairs of jeans and 6 skirts from the op-shop (thrift store). I laid them out where I wanted them on the lounge.
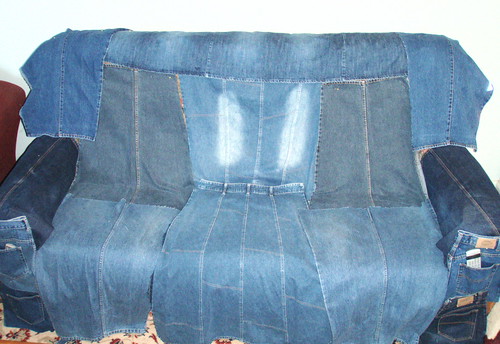 Then I flipped them all over to pin them in place.Sounds easy enough? Well that was Wednesday and I finally completed it today- Sunday! There was lots of walking away and coming back and rethinking how I was going to do it. I wanted it to be very fitted so it wouldn't slip about.
 Of course I had help. Thanks Cinnamon!
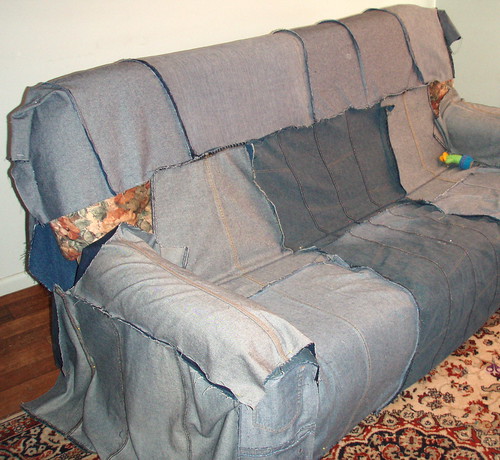
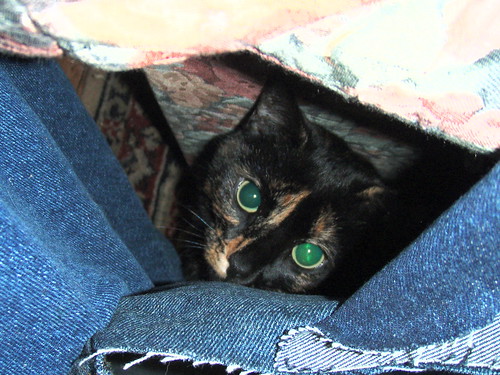 Turned out pretty good I reckon!
 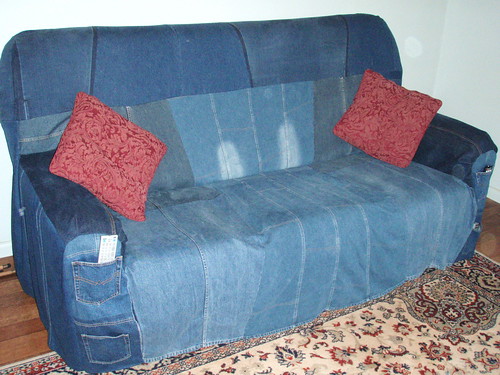 Easy to wash, and it only cost about $25 all up.
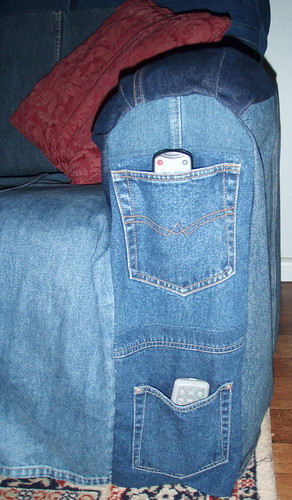 I used the back pockets of the jeans as remote control pockets. Now if I can just train everyone to use them........
 Cinnamon approves and so do I. Now to curl up on my "new" lounge with a glass of wine and a good book!
The lounge was structurally perfect but after 10 years of use it was very threadbare.I never really liked the pattern anyway, I ordered it off a swatch and thought it would hide the dirt, but it was much too florally (is that a word?) for me. First I cut up my fabric. I used 4 pairs of jeans and 6 skirts from the op-shop (thrift store). I laid them out where I wanted them on the lounge.Then I flipped them all over to pin them in place.Sounds easy enough? Well that was Wednesday and I finally completed it today- Sunday! There was lots of walking away and coming back and rethinking how I was going to do it. I wanted it to be very fitted so it wouldn't slip about.Of course I had help. Thanks Cinnamon!Turned out pretty good I reckon! Easy to wash, and it only cost about $25 all up.I used the back pockets of the jeans as remote control pockets. Now if I can just train everyone to use them........Cinnamon approves and so do I. Now to curl up on my "new" lounge with a glass of wine and a good book! Thursday, September 11, 2008
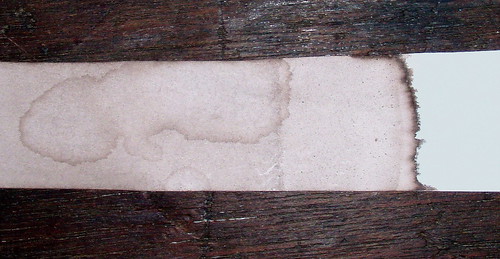
Tutorial - make walnut ink!!!!!
It's easy-peasy!!! If you have a walnut tree or know someone who has, you can make your own walnut ink. It's fabulous for ageing paper or cardstock. I've shown you what it looks like on plain white paper when it's just dipped in and dried.
 First get your old dry walnuts and pry off the black outer skin. Some of it will stick and some will come off easy, just get as much off as you can.
 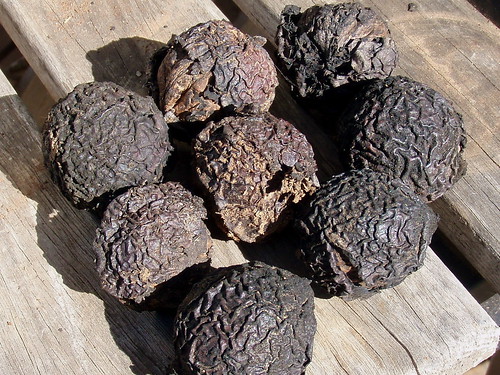 Using a blunt object eg a pestle or the end of a wooden spoon or rolling pin, crush the skins up into smaller bits.
 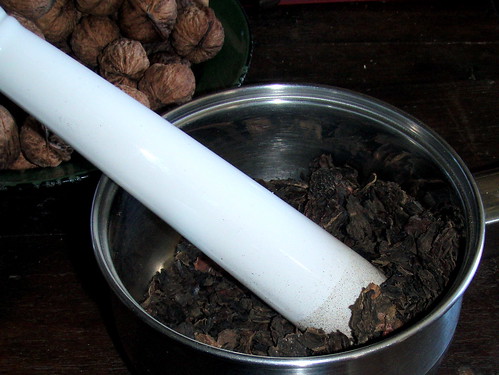 Cover the lot with water and bring to the boil. Simmer until the ink is as strong as possible, I did mine for an hour or so. Don't let it dry out!
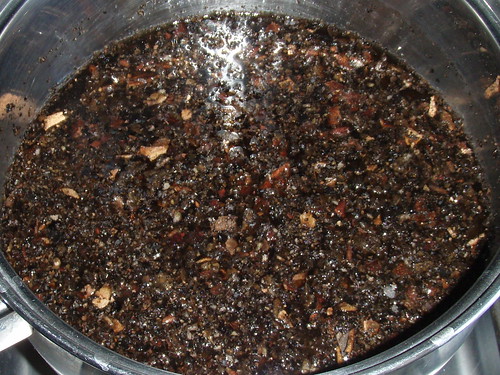
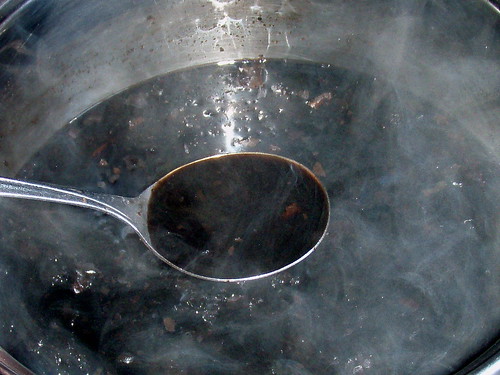 Strain the liquid, add some vinegar to preserve it, I used about 1/4 cup for mine but it depends on your quantities. It won't keep forever but you could freeze it in small lots for later use. Now eat your walnuts!!!!!
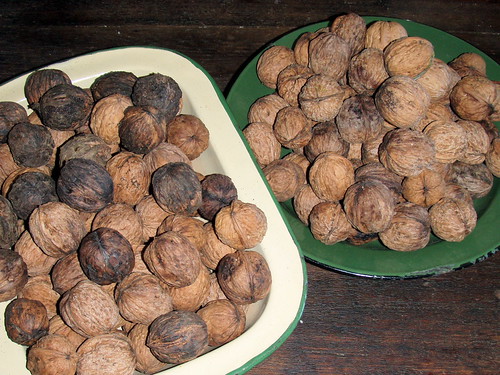
Tuesday, September 9, 2008
Felt bead bracelet and another button bracelet
Here's a little project I did with some of the felt beads I made. I used some granite beads too. The felt beads are a little large so I think I'd make them smaller next time, but I love the earthy colours. I also whipped up a button bracelet using lots of brown and faux tortoiseshell buttons.
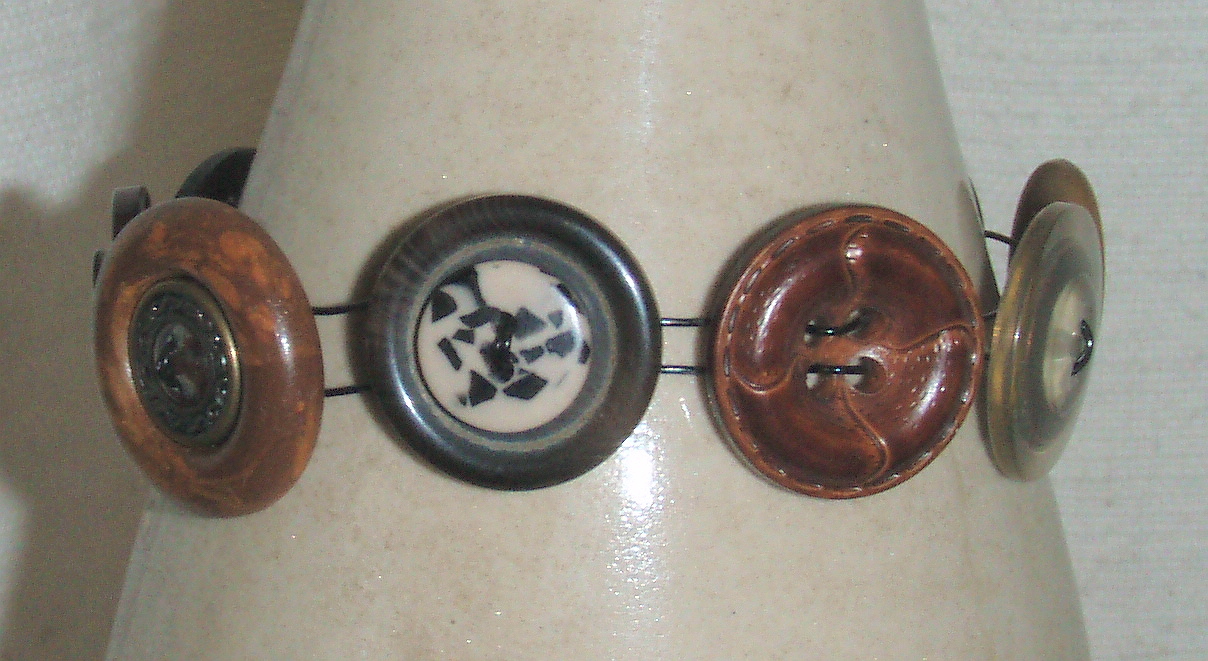
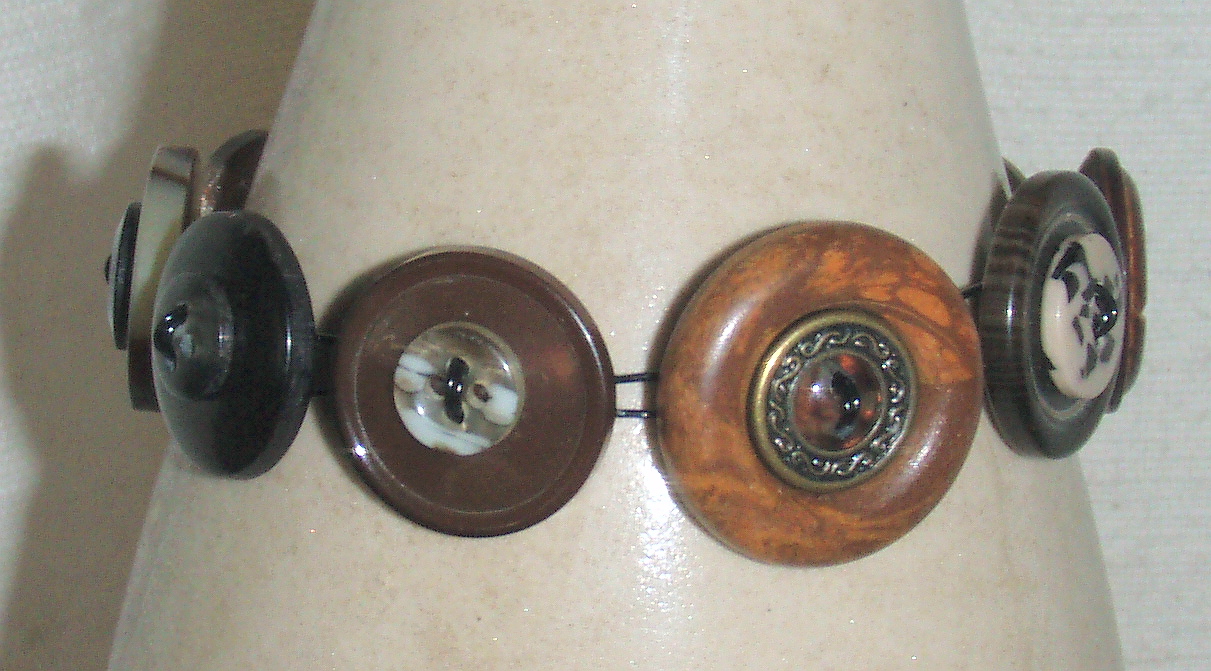
 I'm really enjoying seeing what designs I can come up with. I looooooove buttons, they evoke memories of playing with Mum's button jar as a kid.
I also whipped up a button bracelet using lots of brown and faux tortoiseshell buttons. I'm really enjoying seeing what designs I can come up with. I looooooove buttons, they evoke memories of playing with Mum's button jar as a kid.Monday, September 8, 2008
Dyes, felting and a button bracelet.
I have been experimenting with dyes for various fibres. Here's what I did with food dyes and my own cross-bred wool. 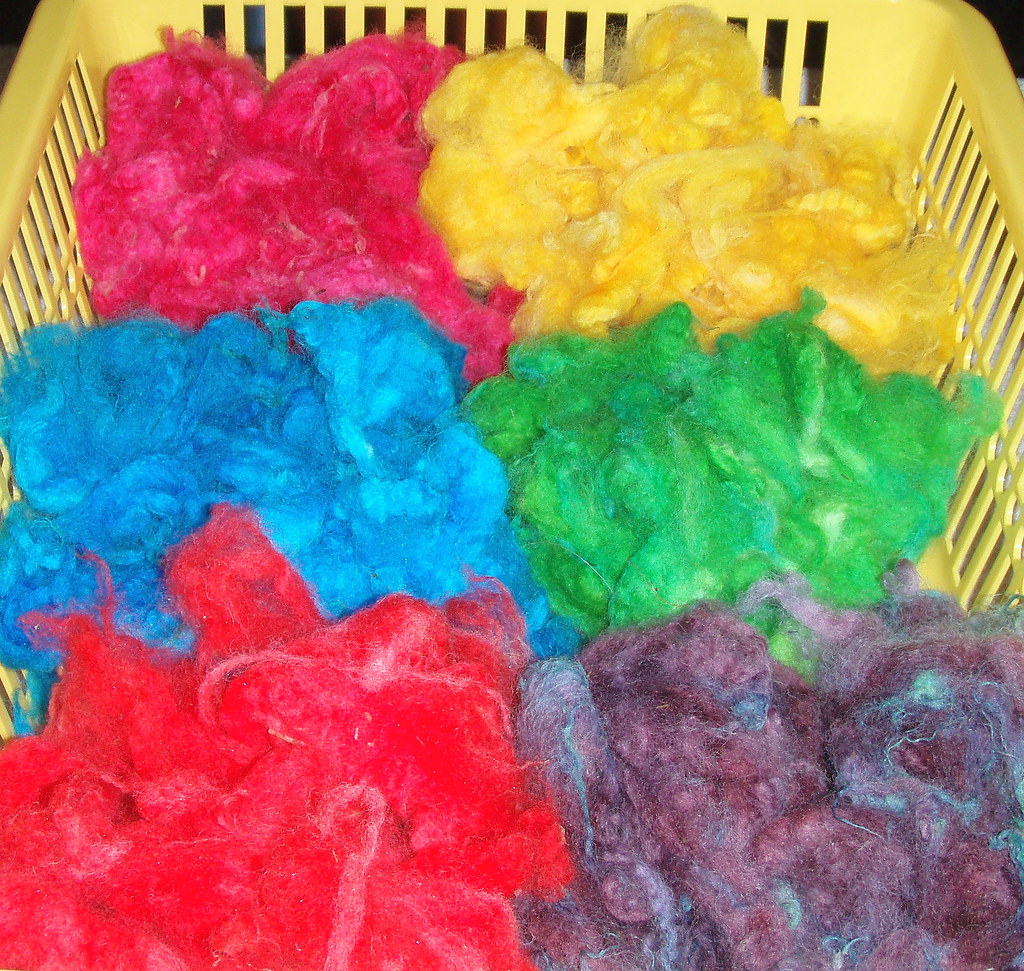 It worked well but of course was extremely bright. I mixed the purple myself and it ended up with a rather interesting mottled effect. If you want to give it a go just wet your wool, add it to diluted dye and zap in the microwave. I did mine for about 2 mins on 70 %, and repeated it 3 times. I also added a tablespoon of vinegar to fix the dye. I had a fun afternoon with my stepdaughter making felt with the dyed fibre.
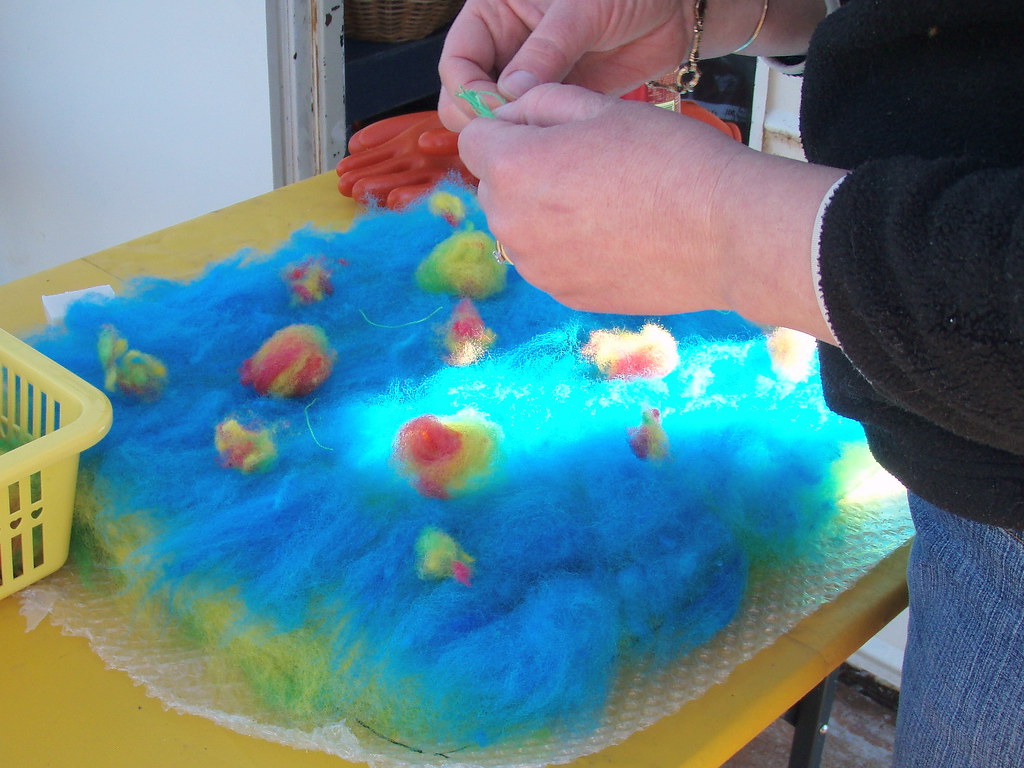
 My tastes are much more in the rustic range of colours, so with the expert help of Jenny I chose some colours I could blend.
 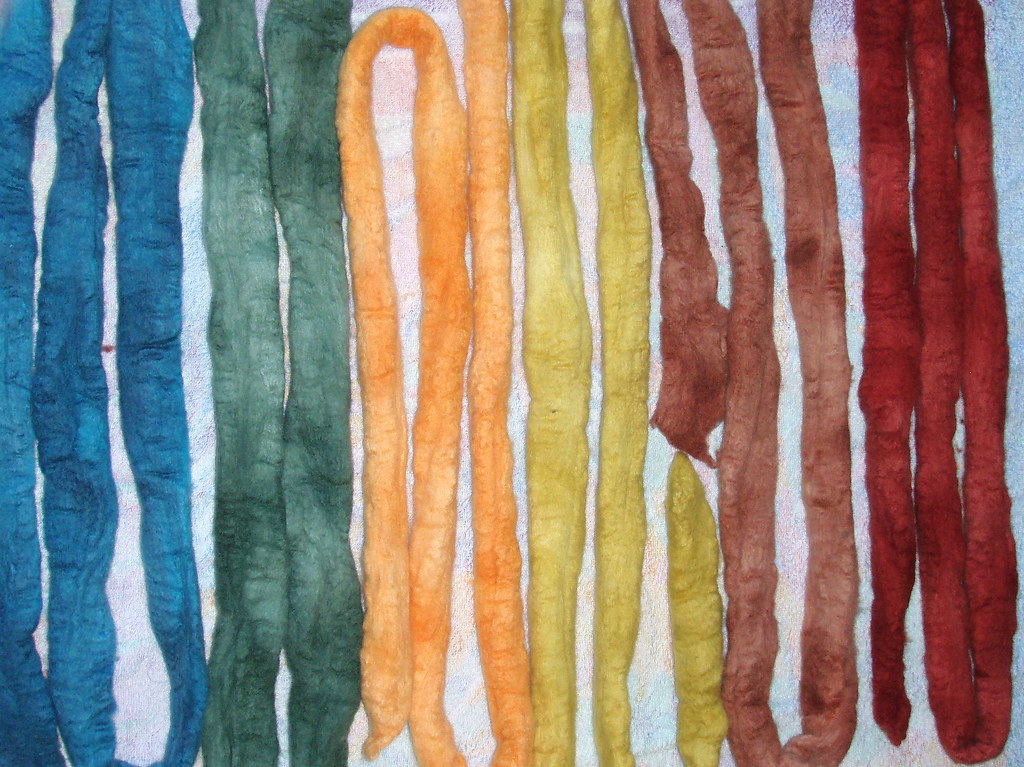 These are the basic colours. I used them to dye some wool tops I had bought. Not so keen on the orange but I am assured it will be a good brightener when blending.
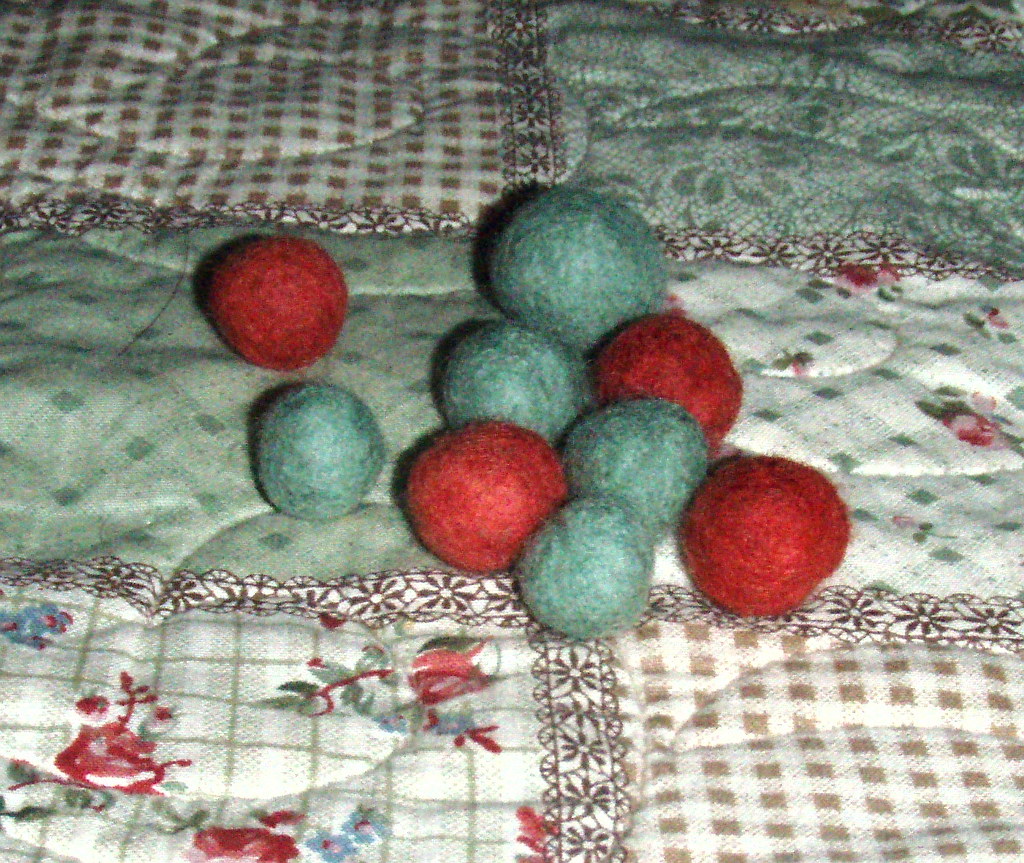 I love the red and green and had to just dive in and make something immediately so felt balls it was! These make great beads to be used on bracelets, key rings, bags etc.
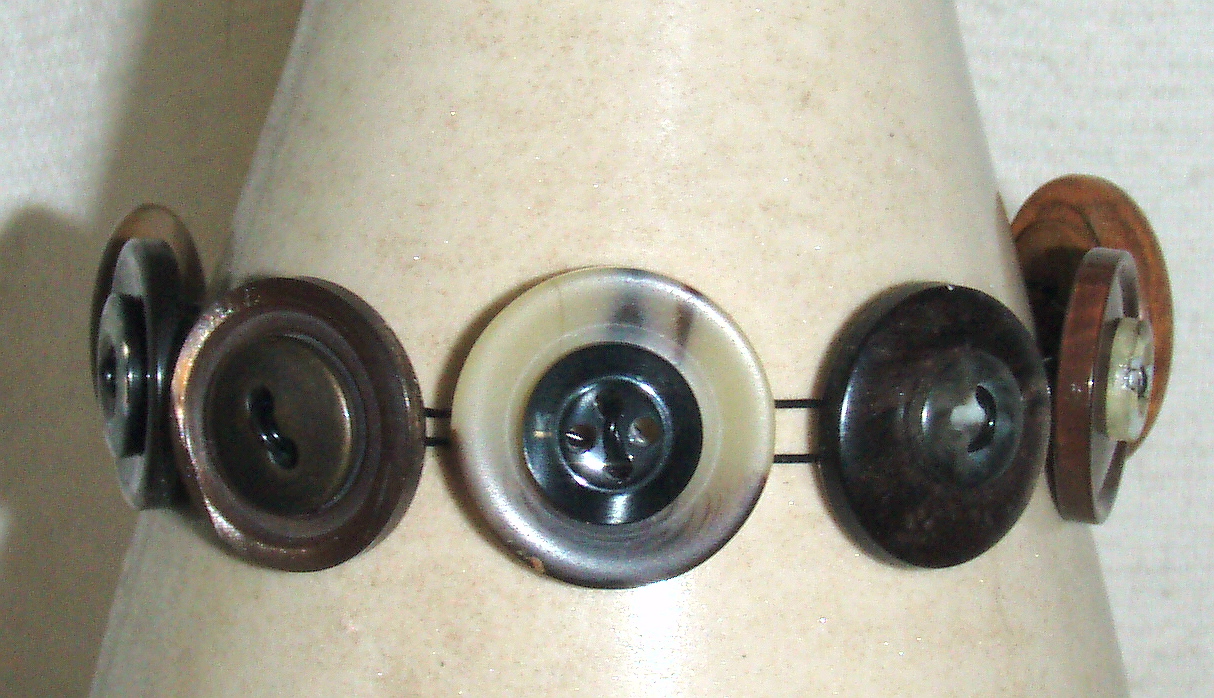
 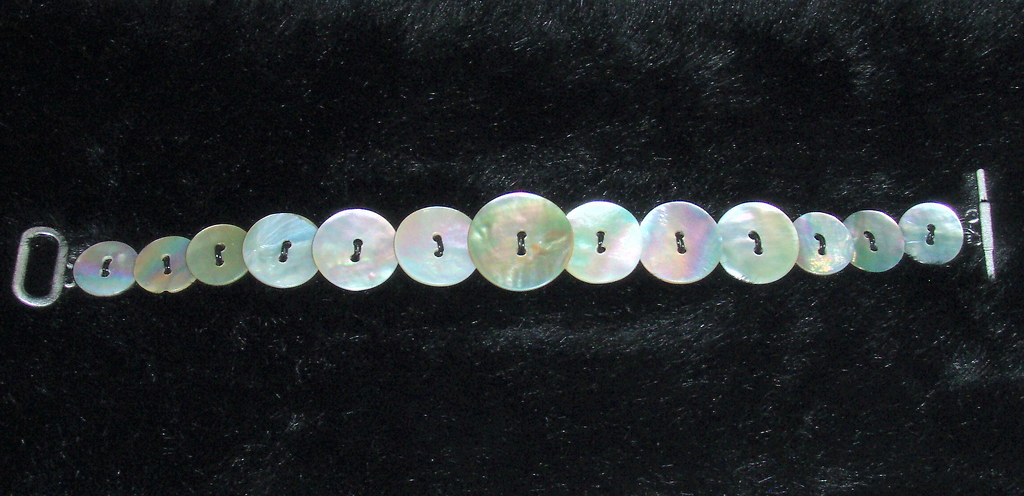 Speaking of bracelets I had so much fun creating this little beauty. I used vintage Mother of Pearl buttons and it just glistens. I have had so many comments on it when I wear it. These buttons are not so easy to find so I am on the search so I can make some to sell.
It worked well but of course was extremely bright. I mixed the purple myself and it ended up with a rather interesting mottled effect. If you want to give it a go just wet your wool, add it to diluted dye and zap in the microwave. I did mine for about 2 mins on 70 %, and repeated it 3 times. I also added a tablespoon of vinegar to fix the dye. I had a fun afternoon with my stepdaughter making felt with the dyed fibre.My tastes are much more in the rustic range of colours, so with the expert help of Jenny I chose some colours I could blend. These are the basic colours. I used them to dye some wool tops I had bought. Not so keen on the orange but I am assured it will be a good brightener when blending.I love the red and green and had to just dive in and make something immediately so felt balls it was! These make great beads to be used on bracelets, key rings, bags etc. Speaking of bracelets I had so much fun creating this little beauty. I used vintage Mother of Pearl buttons and it just glistens. I have had so many comments on it when I wear it. These buttons are not so easy to find so I am on the search so I can make some to sell. Hiya!!!
This is my new blog about my creations and hopefully about selling some of them. I have called it "Clever Chook", an affectionate term my hubby uses to praise my work. For those non-Aussies reading this a chook is a slang name for a chicken. I tend to jump from one craft to another, so you never know what you might find here!
Subscribe to:
Posts (Atom)